노트북에 새로 개발환경을 구성하며 DB 설치 과정을 정리해보았다.
1. Oracle DB 설치
우선 오라클 홈페이지에서 버전에 맞는 DB를 찾아 설치한다.
나의 경우는 직장에서 11g 버전을 사용 중이었기 때문에
해당 버전에 맞게 설치하기로 하였다.
XE Prior Release Archive (oracle.com)
XE Prior Release Archive
Getting Started: Support Oracle Database Express Edition (XE) is a community supported edition of the Oracle Database family. Please go to the Oracle Database XE Community Support Forum for help, feedback, and enhancement requests. Note: Oracle Support Ser
www.oracle.com

다운로드 후 압축 해제하여 setup 파일을 실행한다.

설치파일이 실행하면 아래처럼 설치를 진행한다.


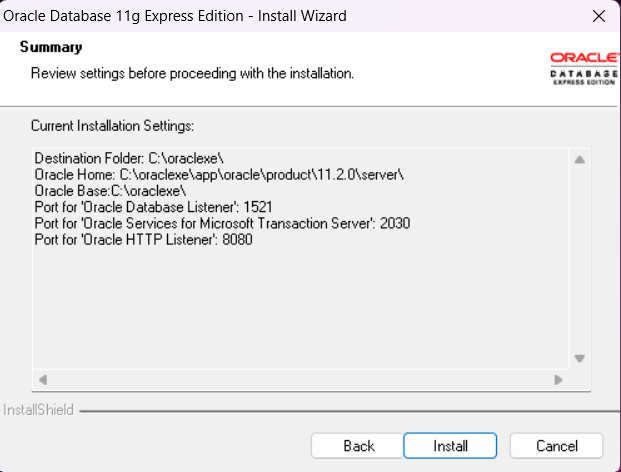


이렇게 오라클 DB 설치가 완료되었다.
2. SQL Developer 설치
다음은 실제 작업을 위한 SQL Developer 를 설치해보겠다.
아래 링크에 들어가서 본인의 os에 맞는 프로그램을 다운받는다.
https://www.oracle.com/tools/downloads/sqldev-downloads.html
Oracle SQL Developer Downloads
This archive. will work on a 32 or 64 bit Windows OS. The bit level of the JDK you install will determine if it runs as a 32 or 64 bit application. This download does not include the required Oracle Java JDK. You will need to install it if it's not already
www.oracle.com

다운 후 압축해제하여 sqldeveloper 파일을 실행한다.


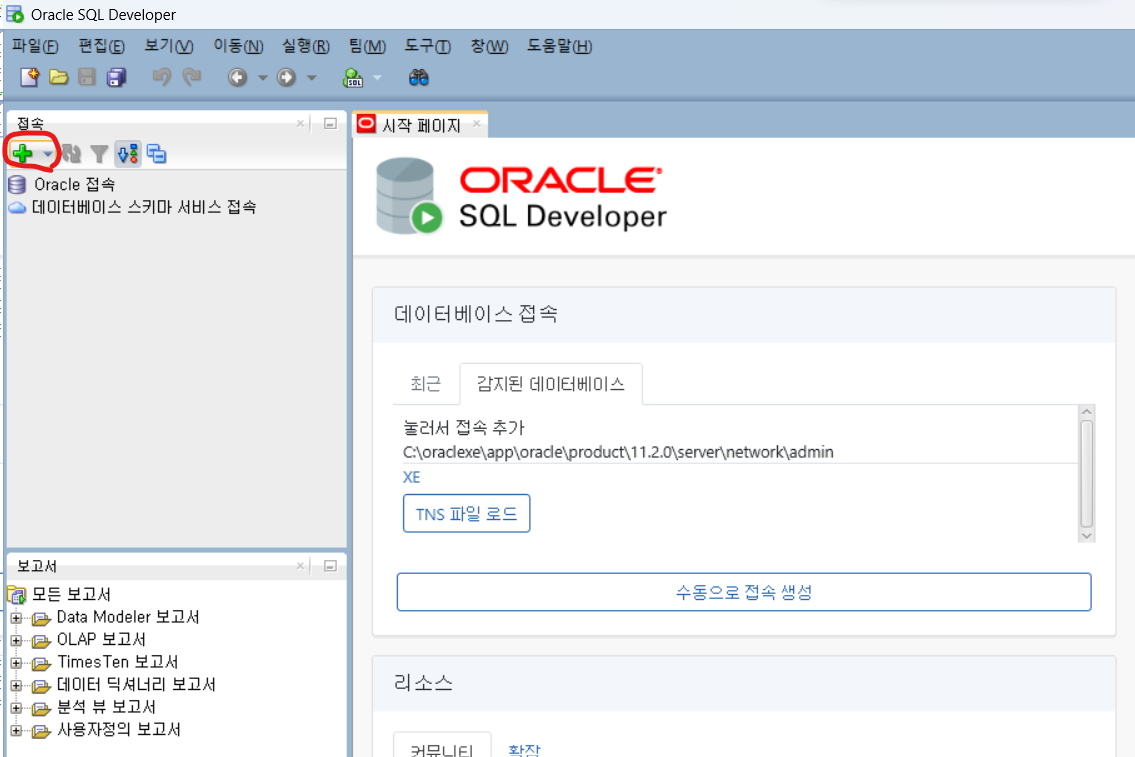
아래처럼 실행화면이 나오면 접속 DB를 추가해준다.
정보를 입력 후 테스트 - 저장 - 접속 순으로 진행한다.

접속된 화면에서 쿼리가 동작하는지 시험해본다.

이렇게 SQL Developer 를 설치하였다.
'개발 > 개발 환경 설정' 카테고리의 다른 글
| VSCODE에서 C언어 개발 환경 세팅하기 (0) | 2022.11.19 |
|---|---|
| VSCODE와 GIT 저장소 연동 (0) | 2022.09.14 |